
Updated for 2026: This guide was originally published in 2024 and has been reviewed and updated for 2026 to ensure the instructions and best practices for creating and customizing WordPress child themes reflect the latest WordPress theme architecture and tools. While the fundamental concept of child themes — inheriting functionality and style from a parent theme to protect customizations — remains the same, recent updates in how WordPress handles theme structures and customization options make this refresh helpful and accurate.
If you have installed a free or premium WordPress theme on your website and have decided you would like to customize some of its design and features, you’ll want to create a child theme to implement those customizations.
In this article, I’ll explain what child themes are, their advantages, and how you can create a child theme for your WordPress site.
Please note, this information covers classic WordPress themes and not the new block themes. This subject matter is also best suited for those who have an understanding of web development processes.
What is a WordPress child theme?
A WordPress child theme allows you to build upon and customize another WordPress theme without editing any of that theme’s files. We call those themes “parent themes”. For example, you could be using the default WordPress theme “Twenty Twenty-One” on your website. This is the Parent theme. You could then decide to create a “Child” theme for “Twenty Twenty-One” so that you can further customize it.
Child themes cannot run on their own. They require the parent theme to always be present within the themes directory in WordPress.
Why can’t I just edit the parent theme files to make my customizations?
You can certainly edit the parent theme files all you want, but I would highly recommend against doing so. The advantage of creating a child theme is that you can benefit from the updates that the theme developer may release for your parent theme. This is especially important since some themes will need to be updated by their developer in order to take advantage of new WordPress features. If you customize the parent theme files, your customizations will be overwritten when you update the parent theme. And if you decide not to update your parent theme, you might not be able to use new WordPress features, or even worse, you could end up with errors on your site because your theme is no longer compatible with the latest version of WordPress or your installed plugins.
Should I always be using a child theme?
The short answer is no, but there are some specific circumstances to consider.
If you are not a web developer and are content with all the customizations that your current theme has to offer via the WordPress admin menus then you won’t even need to worry about the theme files.
If you are a developer, or you are hiring a developer to customize the design and features of your existing theme, then you should definitely create a child theme to implement those customizations.
If you are a developer, or if you are hiring a developer to design and build your website, the decision to create a child theme will depend on whether your developer decides to build the site out from an existing WordPress theme, or if they will be creating a completely custom WordPress theme from scratch. Even if the developer is building out a completely custom theme, they may decide to separate their code and create a child theme for maintenance purposes. In this circumstance, the developer will be the one to decide whether a child theme is necessary or not.
How to create a WordPress child theme
Creating a child theme and customizing it is usually the responsibility of a developer. However, there are plugins available that will assist you in creating a child theme.
Below I’ve outlined both a plugin option and the manual option so you can decide which approach will work better for you.
Option 1: Creating a WordPress child theme using a plugin
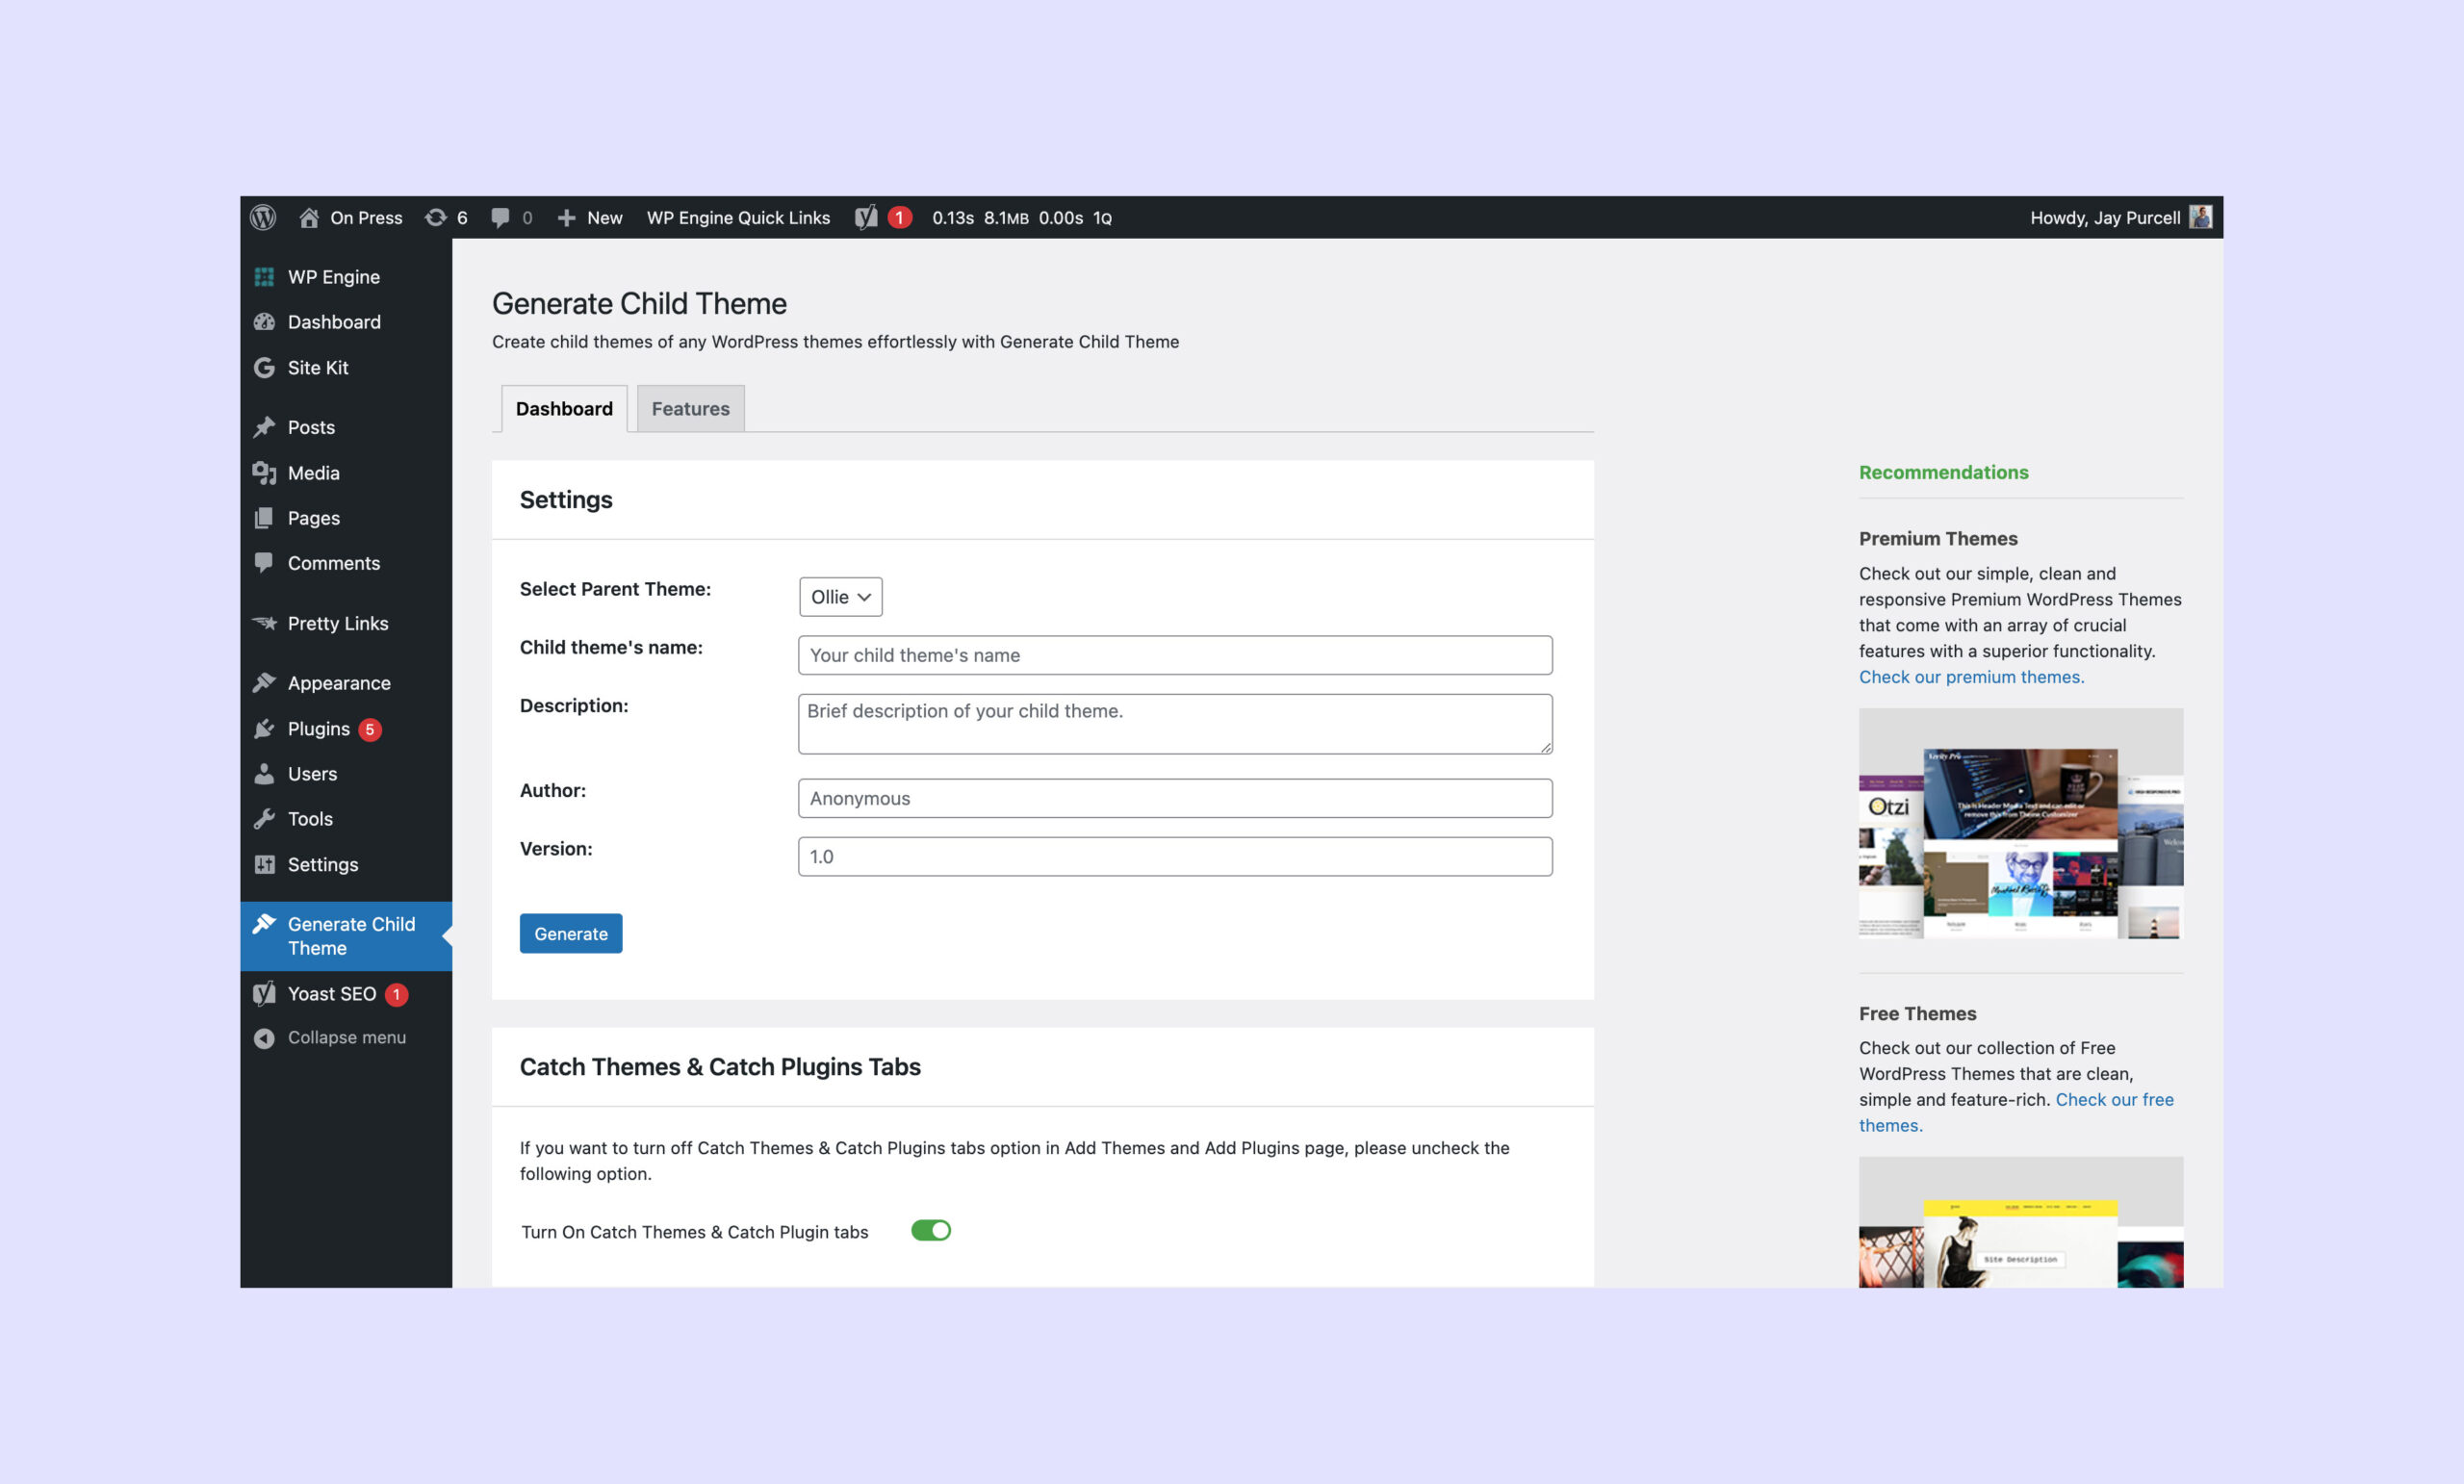
One of the most popular plugins for creating child themes is the “Generate Child Theme Plugin”.
It’s very easy to use. Once installed, the plugin will allow you to create a child theme from any theme that you have installed on your site, with no coding required. All you have to do is fill out a few fields of information during the child theme creation process.
Although this plugin will allow you to create a child theme, it won’t allow you to customize anything about your child theme. To do that, you will still need the skills of a WordPress developer.
Option 2: Create a child theme manually
If you are not comfortable editing code and connecting to your web server via FTP you may want to consider hiring a WordPress developer to accomplish this task for you.
Here are the steps involved:
- Create the child theme folder
- Create the child theme stylesheet
- Enqueue the stylesheet
- Upload, Install & activate the child theme
- Using your child theme to customize and override your parent theme
1. Create the child theme folder
Create a folder on your computer for your child theme. You can call it anything you want, but you may want to incorporate the name of the parent WordPress theme so you can easily recognize this folder later, for example “twenty-twenty-child”.
2. Create the child theme stylesheet
Inside the new folder you created, you can use a code or text editor to create a CSS stylesheet with the name style.css, and paste in the following code:
/*
Theme Name: [ NAME OF YOUR CHILD THEME ]
Theme URI: [ YOUR DOMAIN NAME ]
Description: [ A SHORT DESCRIPTION OF YOUR THEME ]
Author: [ YOUR NAME OR ORGANIZATION NAME ]
Author URI: [ YOUR WEBSITE OR ORGANIZATION'S WEBSITE URL ]
Template: [ MUST EXACTLY MATCH THE FOLDER NAME OF YOUR PARENT THEME ]
Version: 1.0.0
*/
You’ll need to customize the elements I have put in brackets to your own child theme details. The version number can be anything you like.
3. Enqueue the stylesheet
Next, we’ll need to tell WordPress to load the stylesheet when the child theme is activated in WordPress. To do this, use a code or text editor to create a file inside your child theme folder called functions.php, and paste in the following code:
<?php
add_action( 'wp_enqueue_scripts', 'your_child_theme_name_enqueue_styles' );

function your_child_theme_name_enqueue_styles() {
	wp_enqueue_style(
		'your-child-theme-name-style',
		get_stylesheet_uri()
	);
}
You’ll want to customize this with your own naming conventions. But if you just copy and paste this code, it will work just fine. For more information you can refer to the official WordPress documentation.
4. Upload, Install & activate the child theme
Now that you have created the child theme you are ready to upload it to WordPress.
Create a .zip of your child theme folder, then navigate to Appearance > Themes in your WordPress admin to upload your zip file.
Once uploaded you can activate the child theme within WordPress.
If all goes according to plan, the front-end of your site should continue to show the design, features and functionality of your parent theme, but you are technically now running your child theme.
5. Using your child theme to customize and override your parent theme
Now that you have implemented your child theme, you’ll want to make use of it.
The exciting part about having a child theme is that you can extend the design and features of your parent theme, or even override them if you so wish. These tasks should be undertaken by a WordPress developer who has a solid grounding in PHP, HTML, CSS and Javascript.
Before I start work on developing a child theme I like to study the folder structure and files of the parent theme. If you have previously downloaded the theme to your computer, you can open that theme folder up and take a look inside.
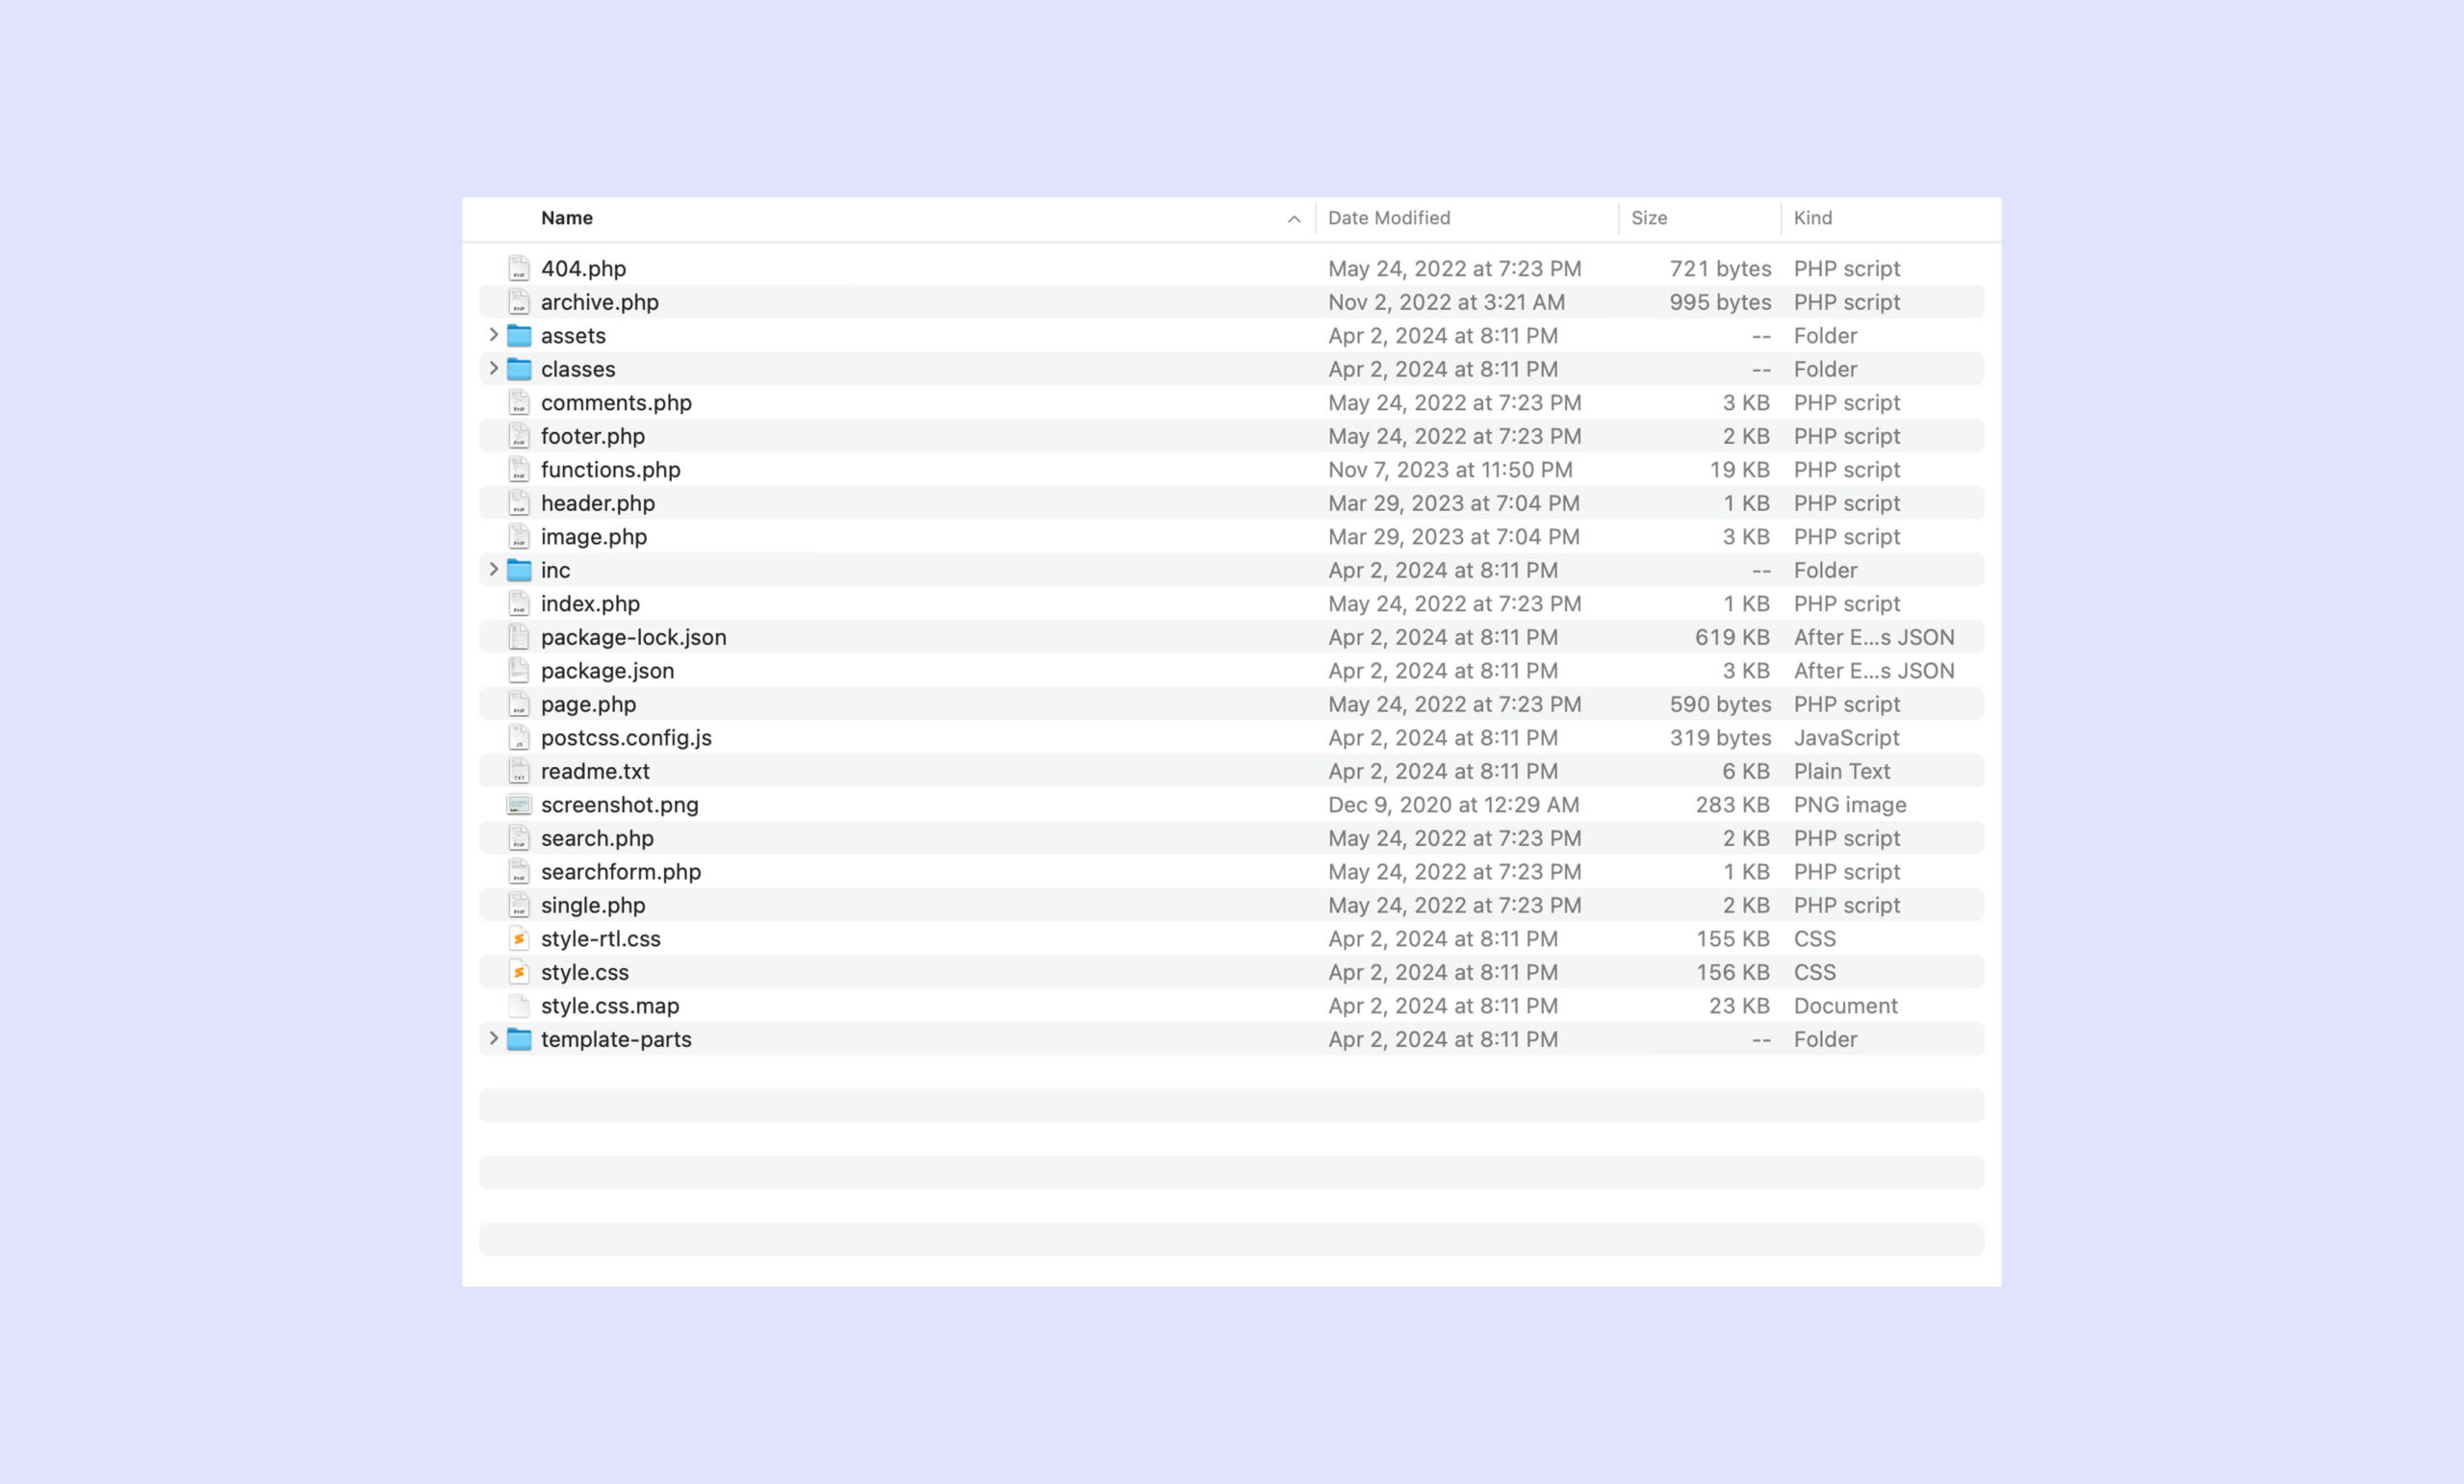
Usually the most basic approach I like to take is to first copy the file or code of the element I want to customize from the parent theme folder to the child theme folder. For example single.php is the template used to show individual WordPress posts. You can copy that entire file from the parent theme and paste it to your child theme, open the file up and start customizing it. The same can be said for every other part of the parent theme including the CSS. Find the block of CSS you want to customize and copy it from the parent style.css file to your child theme style.css and customize that block of code, in this case you can just copy and edit certain lines of CSS code instead of copying the entire file. For PHP files you’ll always want to copy the entire file over before editing it, or you can ignore the parent PHP file and create your own blank PHP file to begin developing from.
The most important thing to know is that WordPress will always load code from the parent theme first and will look to the child theme second to see if there are any customizations.
What happens if I update the parent theme?
If you decide to update your parent theme when an update is available, you may encounter some issues with your child theme. It is a rare occurrence, but it can happen. In this circumstance you will need the help of a WordPress developer to resolve these issues.
In Summary
I hope this article has provided you with a foundation on what WordPress child themes are, when you might need one, and how to create and customize one.
If you have any questions, feel free to post a comment below or book a call with me.
Leave a Reply